Table of Contents (44 sections)
How to Start Dropshipping on Shopify: The Complete Step-by-Step Guide (2026)

The technical part of opening a Shopify store rarely trips anyone up: pick a plan, click through setup, and a working storefront exists within the hour. What actually determines whether that storefront turns into a business is a longer list of decisions most quick-start guides skip past. This guide works through all of them, organized as eight phases and 24 concrete steps: planning, building the store, finding and vetting products and suppliers, building the offer, configuring operations, testing before launch, launching, and scaling once orders start coming in.
This is a complete answer to how to start dropshipping on Shopify: each step below tells you what to do, why it matters, and where to find the setting inside Shopify's current admin. By the end, you should be able to go from no store at all to a fully configured, tested storefront ready for its first real customer.
Shopify admin paths and platform information last verified against Shopify's official documentation on August 7, 2026. Shopify periodically renames or relocates settings, so if a path below has moved, Shopify's in-admin search bar will still find it by name.
Quick answer
Starting a Shopify dropshipping store means: pick a plan and sign up, set up the store's name, domain, theme, and navigation, choose how you'll source products, validate specific products with real evidence instead of a hunch, add and optimize your listings, configure payments, shipping, and tax settings, run a full test order before you launch, then market with organic content first and controlled paid tests second. A lean first-month planning budget might fall around $150 to $600, with the largest variable usually being how much you choose to spend on product testing and marketing.

Phase 1: Plan
Step 1. Understand how Shopify dropshipping works
What it is. In a dropshipping model, you sell a product through your own storefront, but a third party (a supplier, manufacturer, or another retailer) holds the inventory and ships the order directly to your customer. This generally means you're not pre-purchasing bulk stock the way a traditional retailer would. It doesn't mean the model is free of cash-flow risk, though: supplier payment timing and payment-provider payout timing don't always line up, so you can still need working capital to cover the gap between paying a supplier and actually receiving payout funds from a sale. Your margin is the difference between what the customer pays you and what you pay the supplier, minus platform, payment, and marketing costs.
Shopify's role. Shopify is the storefront, checkout, and operations dashboard: product pages, order management, payments, shipping settings, and reporting. It does not find your supplier, monitor your prices, or fulfill orders by itself. Depending on how you choose to source products later in this guide, some of that work happens through a native Shopify feature, a product-import app, or a direct relationship you manage yourself.
What to check before moving on. Make sure you're comfortable with the core trade-off: dropshipping reduces how much inventory you need to hold and pay for upfront, which lowers the risk of being stuck with unsold stock, but it also means you don't control supplier quality, stock levels, or shipping speed directly. Every later step in this guide exists to manage that trade-off.
Common beginner mistake. Treating "no inventory" as "no operational responsibility." As the seller, you're still the one your customers hold responsible for shipping times, quality, and support, even though a supplier fulfills the order behind the scenes.
Step 2. Estimate your startup budget
Shopify's advertised monthly price is only part of the real cost. The table below reflects Shopify's own published pricing, verified directly against shopify.com/pricing, plus the other expenses that show up once a store is actually running.
| Cost | What it covers | Published rate / planning estimate |
|---|---|---|
| Shopify plan | Storefront, hosting, admin dashboard | Basic $39/mo ($29/mo billed yearly), Grow $105/mo ($79/mo yearly), Advanced $399/mo ($299/mo yearly)[1] |
| Card processing (Shopify Payments) | Fee on every transaction | 2.9% + $0.30 on Basic, 2.7% + $0.30 on Grow, 2.5% + $0.30 on Advanced[1] |
| Third-party gateway surcharge | Extra Shopify fee if you skip Shopify Payments | 2% on Basic, 1% on Grow, 0.6% on Advanced (avoided entirely by using Shopify Payments)[1] |
| Domain | Custom .com or similar | Illustrative planning estimate: roughly $10 to $20 per year |
| Theme | Store design | Illustrative planning estimate: free themes are fully usable; current Theme Store listings for paid themes mostly run in the roughly $100 to $500 one-time range, and that range shifts over time, so check the Theme Store directly |
| Apps | Product sourcing, reviews, email, and similar tools | Illustrative planning estimate: varies widely by stack; many beginners start around $0 to $50/mo |
| Product samples | Testing supplier quality before you list | Illustrative planning estimate: typically $20 to $100 total for a first round of samples |
| Marketing and testing budget | Traffic to actually validate a product | Illustrative planning estimate: highly variable; a modest paid-testing budget for early validation is often in the low hundreds of dollars per month |
The domain, theme, app, sample, and marketing figures above are illustrative planning estimates, not universal costs. Actual amounts vary by niche, chosen suppliers, app stack, and how much you decide to spend on testing, so treat them as a starting point for your own budget rather than a fixed target. The Shopify plan and payment-processing figures, by contrast, are Shopify's own published rates.[1]
Shopify's trial structure as of this writing offers a short free trial followed by a reduced introductory rate for the first few months before switching to standard pricing, though trial terms can change, so confirm the current offer at signup.[1]
What to check before moving on. Decide, in writing, what you're willing to spend in month one if you get zero sales. This number should be small enough that a slow first month doesn't put real financial pressure on you, since testing takes time.
Common beginner mistake. Budgeting only for the Shopify plan fee. The plan fee is usually the smallest line item. Apps, payment processing, and marketing typically cost more than the platform itself.
Step 3. Choose a niche and target customer
What to do. Pick a category broad enough to support more than one product idea, with an audience specific enough that you could describe who's buying and why in one sentence.
Why it matters. Your niche shapes your store name, your supplier options, your marketing angle, and how easily you can expand your catalog later without confusing your existing customers.
How to evaluate a niche. Rather than scoring a category against a fixed checklist, work through it as a short chain of reasoning:
- What can you credibly speak to? A category you already understand, even a little, makes product descriptions, customer questions, and content noticeably easier to produce convincingly than a category chosen purely because one video looked interesting.
- Does the category's economics look workable before you've even picked a product? Some categories are structurally price-competitive with thin margins regardless of which specific item you choose. This is a rough gut-check here; Step 15 covers the full unit-economics math once you have a real product in front of you.
- Is there more than one plausible product in this space? A niche that only supports a single hero item gives you one shot. A niche with several sourceable, sensible products gives you room to test, drop what doesn't work, and try something else without abandoning the whole store.
- How much operational friction does the category add? Bulky, fragile, or heavily regulated products, and categories with structurally higher return rates such as sized apparel, all raise the bar for how well everything else in this guide needs to be executed.
Next step. You don't need to finalize every product before moving forward. You need enough direction to name your store and start building. Product-level validation happens in Phase 3.
Phase 2: Build the store
Step 4. Create your Shopify account
How to do it. Go to Shopify's signup page, enter your email and basic business details, and choose a plan. Basic is enough for most new stores, though your specific order volume, staffing, or reporting needs might call for more; you can upgrade later as those needs grow.
What to check before moving on. Shopify's trial and introductory-pricing terms change periodically, so confirm the current offer on the pricing page before you commit to a plan.[1]
Step 5. Choose a store name and connect a domain
What to do. Pick a name that's easy to say, spell, and remember, and that leaves room to grow beyond a single product. Then connect a custom domain instead of running on the default myshopify.com subdomain.
Why it matters. A custom domain supports customer trust and basic SEO. It also just looks like a real, permanent business rather than a store that might disappear next month.
How to do it. Shopify Admin → Settings → Domains → Connect existing domain (if you bought one elsewhere) or Buy new domain (to purchase directly through Shopify).[2]
If you buy elsewhere, you'll either connect automatically by logging into your domain provider, or connect manually by pointing DNS records (A record, AAAA record, and a CNAME for "www") to Shopify's addresses, which Shopify's domain settings page will display for you.[2] Propagation can take up to 48 hours.[2]
Common beginner mistake. Launching on the default myshopify.com address and forgetting to switch to a custom domain before running any paid traffic to the store.
Step 6. Create basic branding
What to do. Put together a simple logo and a small, consistent color palette. You don't need a finished brand identity yet, just something coherent enough that your store doesn't look unfinished.
How to do it. Shopify offers a free logo maker that doesn't require a store login to start designing, and general design tools like Canva work well for a first-pass logo too. Either way, treat the result as a placeholder you can upgrade once you've proven a product works, not a final brand identity.
What to check before moving on. Your logo and primary brand color should be usable at small sizes (a browser tab icon, a mobile screen) without becoming illegible.
Step 7. Choose a Shopify theme
How to do it. Shopify Admin → Online Store → Themes → Customize (or Edit theme next to the theme you want to use).[3]
Shopify's free themes are mobile-responsive and cover what a new store actually needs at launch. A paid theme is worth considering once you have a proven product and want a more distinctive layout, not before. Current Shopify Theme Store listings mostly fall in the roughly $100 to $500 one-time range, though Shopify's theme lineup and pricing change over time, so treat that as a rough planning figure and check the Theme Store directly.
What to check before moving on. Preview the theme on a mobile screen width specifically. Ad traffic from short-form video platforms in particular tends to skew heavily toward mobile devices, so a theme that only looks good on desktop is a real liability even before you've measured your own store's traffic mix.
Step 8. Customize the homepage
Why it matters. How quickly a homepage communicates what you sell affects how many visitors stick around to explore it. A homepage that makes a visitor dig for basic context, what you sell, who it's for, whether it looks legitimate, gives them an easy reason to leave before they've seen a single product.
How to do it. Inside the theme editor from Step 7, focus on a small number of changes that actually affect first impressions:
- Brand color and logo placement, set once and applied consistently across the theme.
- Hero section text and image, replacing placeholder copy with a sentence that tells a visitor exactly what your store is about.
- An announcement bar, such as a shipping policy or a current offer, placed where it's visible without being intrusive.
- High-quality product images in place of stretched or low-resolution supplier photos.
Common beginner mistake. Over-customizing the homepage before a single product has sold. Get it clean and functional, then revisit it once you know which products and messaging actually resonate.
Step 9. Build navigation and essential pages
How to do it. Shopify Admin → Content → Menus → select the menu you want to edit → Add menu item.[4]
Put frequently needed pages in the header (Home, Products or Shop, About, Order Tracking) and less urgent pages in the footer (Return Policy, Shipping Info, Contact). Nesting menu items under a parent creates a drop-down automatically if your theme supports multi-level navigation.[4]
What to check before moving on. Click through your own navigation as if you were a first-time visitor. If you can't find your return policy or contact information within two clicks, a customer won't either.
Phase 3: Products and suppliers
Step 10. Research and validate products
This is the step most beginner guides compress into "check what's trending." A single metric, whether it's views, likes, or a supplier's order count, is not enough on its own to justify spending test budget on a product. A more reliable approach looks at several signals together and treats each one as evidence rather than proof.
Signals worth checking for every candidate product:
- Demand direction. Is interest growing, stable, or fading? Tools like Google Trends and marketplace bestseller or "movers and shakers" lists can show direction, though they don't show the full picture on their own.
- Trend and lifecycle stage. A product can be early (limited history, higher uncertainty), growing (rising activity, more sellers entering), mature (established demand, heavier competition), or saturated and declining (falling interest, shrinking margin for new entrants). Where a product sits changes how much execution it needs to work.
- Advertising activity and ad longevity. Ongoing ad activity from other sellers can be a useful signal because advertisers rarely keep paying for creative that consistently loses money. A single new ad tells you little. Multiple advertisers running creative for weeks or months is more informative.
- Creative variety. Several different creative angles being tested around the same product can suggest active, ongoing validation by other sellers, not just a one-off experiment.
- Competition and differentiation. If a dozen stores are already running the same product with the same photos, you're competing on price by default. A different angle, bundle, or audience can matter more than the base product.
- Margin. After landed product cost, payment processing, and a realistic shipping estimate, is there enough room left to cover ad spend and still profit? A thin margin can work at high volume, but it leaves little room for error while you're still testing.
- Shipping complexity. Weight, fragility, and battery or liquid restrictions all affect cost and delivery time. A product that's cheap to source but expensive or slow to ship can quietly erase its own margin.
- Return risk. Apparel with sizing variability, electronics with a higher defect rate, and anything making a specific performance claim tend to generate more returns. Factor this into your expected margin, not just your listed price.
- Data completeness and confidence. Some products have rich, consistent signals across multiple sources. Others have thin, inconsistent, or conflicting data. Treat a promising score built on thin data with more caution than the same score built on multiple consistent signals.
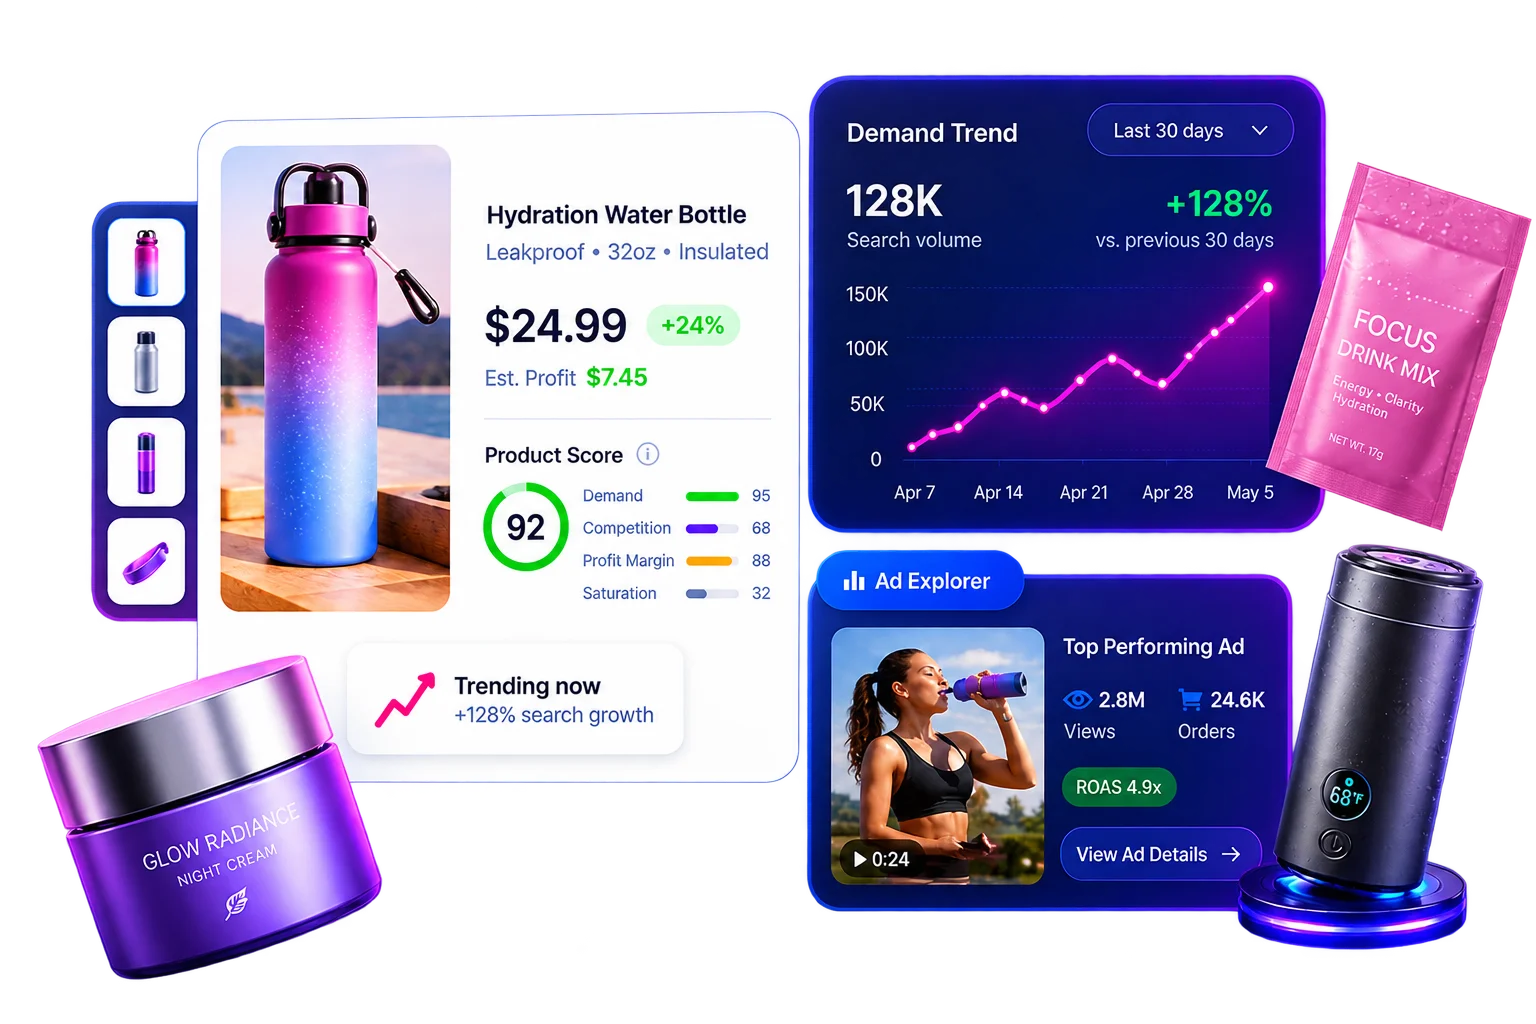
Why a research workflow matters. Evaluating a product this way takes longer than picking whatever looks trending in a short-form video feed, but it meaningfully reduces the number of decisions made on instinct alone. This is where a dedicated research workflow earns its keep instead of switching between a dozen browser tabs and screenshots. Dropmind organizes advertising activity, product signals, lifecycle stage, and confidence in the underlying data into one workflow, so you can compare promising products side by side instead of chasing whatever a single video happens to be showing you. If you want to look closer at how a specific product is actually being advertised, you can also study active ads to see how sellers are positioning it, how long the creative has been running, and whether multiple variations are being tested.
None of this guarantees a result. It gives you more to evaluate before you spend money finding out, and it does not replace the sourcing, supplier, and store-setup work covered in the rest of this guide.
Common beginner mistake. Picking a product because it has a high view count on one video, then discovering during Step 12 that the only available supplier is unreliable, or during Step 15 that the real landed cost leaves almost no margin.
Step 11. Choose a sourcing model
Shopify sellers generally source products through one of three paths. They aren't mutually exclusive, and most sellers eventually use more than one.
| Sourcing path | How it works | Best fit | Trade-offs |
|---|---|---|---|
| Native Shopify sourcing | Shopify Collective lets eligible retailers connect with eligible suppliers to sell each other's products in-store, with the supplying merchant fulfilling the order[5] | Sellers who want to connect with same-country, same-currency Shopify suppliers without negotiating individually | Both sides need an active Shopify plan and must be in a supported country using a supported currency; catalog limited to participating, eligible merchants[5] |
| Third-party product-import and order-automation apps | Apps in the Shopify App Store connect to supplier catalogs and can automate importing, price and stock monitoring, and order fulfillment | Beginners who want a larger catalog to test from and less manual order handling | Adds a recurring app cost; catalog quality and supplier reliability vary by app |
| Direct supplier relationships | You source and negotiate with a manufacturer or wholesaler directly, sometimes with custom packaging or private labeling | Sellers who already know what sells and want better margins, more control, or a real brand | Requires more upfront work, sample orders, and supplier vetting; higher-volume marketplaces like AliExpress also list large public catalogs you can approach directly outside any app |
None of these paths is inherently correct. A reasonable starting approach is a third-party import app or Shopify Collective, both of which reduce manual order handling while you're still validating whether a product and niche actually work. Direct sourcing (including negotiating with a supplier you found on a marketplace like AliExpress or a wholesale directory) tends to make more sense once you have evidence that a specific product sells and you're ready to invest in a stronger, harder-to-copy version of it.

What to check before moving on. Whichever path you choose, treat the sourcing tool as infrastructure, not as the decision that determines whether a product will sell. That decision belongs to Step 10 and Step 12.
Step 12. Vet suppliers and order samples
Whatever goes wrong with a supplier eventually lands on your customer's doorstep, not the supplier's. A late shipment, a damaged item, a listing that doesn't match what arrived: your customer experiences all of it as your problem, regardless of who was actually responsible. That's why the vetting work below is worth doing properly the first time, even though it's the step most beginners are tempted to rush past.
What to check for any supplier, regardless of sourcing path:
- Product quality. Order at least one sample yourself before listing a product at any real volume. Photos and reviews on a supplier's page tell you less than holding the actual item.
- Processing time. How long between an order being placed and it actually shipping? This is separate from transit time and often gets overlooked.
- Realistic shipping time. Ask for real transit-time ranges to US addresses, not a best-case number. Build your customer-facing shipping estimate around the realistic figure, not the optimistic one.
- Tracking. Confirm the supplier provides trackable shipping by default, not as a paid add-on you have to remember to select on every order.
- Communication. Message the supplier with a real question before committing. Slow or vague responses during the sales process usually predict worse communication once something goes wrong.
- Stock consistency. Ask how often the item goes out of stock and how you'll be notified. An unreliable stock signal creates overselling problems on your end.
- Packaging. Request photos of how the item ships. Poor packaging drives damage claims and returns regardless of product quality.
- Returns and refund handling. Understand the supplier's own return policy toward you before you finalize your customer-facing return policy in Step 19. You can't promise your customers more than your supplier can support.
If you're sourcing from a large public marketplace directly, also check the seller's own track record (order volume, rating, and time active as a seller) before you commit to more than a sample order.
What to check before moving on. You should be able to answer, in one sentence each: how long will this realistically take to ship, what happens if it arrives damaged, and how will I know if it goes out of stock.
Common beginner mistake. Skipping the sample order to save a few days and finding out about a quality or packaging problem from your first real customer instead.
Phase 4: Build the offer
Step 13. Add products to Shopify
How to do it. Shopify Admin → Products → Add product, for adding items one at a time with full control over each field.[6] For larger catalogs, Shopify supports bulk import through a CSV file using Shopify's own product CSV template.
A third-party product-import app (see Step 11) can also pull listing details from a supplier page and create draft listings automatically, which is faster for a large catalog but still requires the page-level editing covered in Step 14 before anything goes live.
Common beginner mistake. Publishing a product straight from an automated import without reviewing the title, description, images, and variants first. Automated imports save time on data entry, not on quality control.
Step 14. Build and optimize product pages
Why it matters. Whatever brought someone to your store, an ad, a search result, a friend's recommendation, this is usually the page where they decide to buy or leave. A weak product page can waste a large share of the traffic and marketing spend that reaches it, even when the rest of the store looks solid.
What a credible product page needs:
- A customer-focused title that describes the product in the customer's terms, not a generic supplier title full of keywords stacked together.
- Clear product media, ideally multiple angles and, where possible, a short video. Replace low-resolution or oddly cropped supplier photos rather than using them as-is.
- The problem or use case, stated plainly near the top, so a visitor immediately understands what this solves for them.
- Benefits before features. Explain what the product does for the customer first, then list the factual specifications (materials, dimensions, compatibility) below that.
- Variants, if applicable (size, color, style), set up cleanly so a customer isn't guessing which option they're actually ordering.
- A realistic shipping expectation, drawn from the actual transit time you confirmed in Step 12, not an optimistic guess.
- A clear returns summary, consistent with the store policy you'll finalize in Step 19.
- A short FAQ addressing the two or three questions you'd expect a skeptical buyer to have.
- Genuine social proof, such as real reviews once you have them. Don't fabricate testimonials or review counts.
- One clear call to action, not competing buttons or scattered links pulling attention away from "add to cart."
Common beginner mistake. Copying the supplier's stock description word for word. It's usually poorly formatted, overly long, and identical to what dozens of other stores selling the same item are already using.
Step 15. Set pricing using real variable costs
How to do it. Build your price from the real cost stack behind a single unit sold and delivered, not from the supplier's list price alone, and not from a generic markup multiplier applied without checking what it actually needs to cover.
Start with landed cost: what it actually costs to get one unit into your customer's hands. For a typical direct-to-customer dropshipping order, that includes the product or supplier cost, the real shipping cost to a US address (confirmed with your supplier in Step 12, not an optimistic guess), and, where applicable, import duties or tariffs and any separate brokerage or customs-clearance charge. Duties, tariffs, and brokerage costs depend on the specific product, its country of origin, and current trade rules, all of which change periodically, so check whether they apply to your product rather than assuming they don't.
Landed cost still isn't your full cost of making a sale. Add payment processing (the card-processing rate from Step 2, applied to your actual selling price), a refund and return reserve (a percentage of revenue set aside for expected refunds and returns rather than treated as a surprise later), and your realistic advertising cost per sale.
Subtract all of that from your selling price, and what remains is your contribution margin: what each sale actually contributes toward profit once its own variable costs are covered. A price that doesn't leave a positive contribution margin after realistic versions of every cost above isn't a price, it's a plan to lose money at volume.
What to check before moving on. Calculate your break-even price using this full cost stack, including a realistic advertising cost per sale, before you launch. If you don't know your break-even point, you won't know whether a "sale" is actually profitable.
Phase 5: Store operations
Step 16. Configure Markets and currency
How to do it. For your primary store currency: Shopify Admin → Settings → General → Store defaults → Currency display → Change store currency.[7] If you're selling primarily to US customers, set this to USD.
For selling to multiple countries with localized pricing and currency display: Shopify Admin → Markets → Create market, then add the countries or regions you want to include.[8] Markets is included on every Shopify plan, and automatic local-currency display requires Shopify Payments to be active.[8]
What to check before moving on. If your store has already processed orders, changing your primary store currency becomes locked and requires contacting Shopify Support, so confirm this setting before you start selling, not after.[7]
Step 17. Configure checkout and shipping
How to do it. Checkout settings: Shopify Admin → Settings → Checkout, where you can edit your checkout configuration, including which contact details you require and how the checkout, order status, and thank-you pages behave.[9]
Shipping: Shopify Admin → Settings → Shipping and delivery → Shipping profiles → Add custom profile, where you set a shipping zone covering the United States (at minimum) and the rates that match what your supplier or fulfillment app actually charges.[10]
Many stores fold shipping cost into the product price and offer free shipping at checkout. Some sellers see this reduce checkout abandonment, though the effect isn't universal and depends on category, price point, and audience expectations, and it only makes sense if the unit economics from Step 15 still work once that cost is absorbed into the price.
Common beginner mistake. Setting shipping rates based on a guess rather than the realistic transit and cost figures confirmed with your supplier in Step 12.
Step 18. Configure payment providers
How to do it. Shopify Admin → Settings → Payments → Activate Shopify Payments, in the Shopify Payments section.[11]
For US-based stores, Shopify Payments is generally the simplest default: it's built into the same admin screen, supports major cards, and avoids the third-party gateway surcharge described in Step 2. Adding PayPal as a secondary option through Settings → Payments → Additional payment methods is common and can reduce checkout friction for customers who prefer it.
What to check before moving on. Place a real test order (covered fully in Step 21) to confirm payment actually processes correctly before you send any traffic to the store.
Step 19. Add store policies
How to do it. Shopify Admin → Settings → Policies for your return and refund policy, shipping policy, terms of service, and legal notice.[12] Shopify Admin → Settings → Customer privacy → Privacy policy, where you can use Shopify's automated policy template or draft your own.[12]
Shopify provides editable templates for most of these, but you still need to fill in your store's actual terms rather than leaving placeholder text in place. The one exception is the legal notice, which you'll generally need to write yourself based on your specific business structure and location.
Common beginner mistake. Publishing a return policy that promises more than your supplier can actually support. Check Step 12's supplier return terms before finalizing your customer-facing policy.
Step 20. Understand US sales-tax basics
This section is deliberately brief. It's real, and it's easy to get caught off guard by, but a beginner Shopify tutorial shouldn't turn into a tax course.
If you sell to customers in the United States, you may be required to collect sales tax in states where you have "nexus," meaning either a physical presence or having crossed that state's economic threshold. As of this research, most states set that threshold at $100,000 in annual sales, though a few states use a higher figure, and a transaction-count test (commonly 200 transactions per year) still applies in some states while several others have removed it in the past two years.[13] Because thresholds and rules change and vary by state, verify the current requirement for each state where you have meaningful sales rather than relying on a fixed number.
Shopify Tax can calculate rates automatically once nexus is configured under Settings → Taxes and duties, but registering with each state and filing returns remains the seller's responsibility.[14] You don't need to form an LLC to start dropshipping. A sole proprietorship requires no separate formal registration to begin operating in most states, which is why many beginners start there, and many sellers consider forming an LLC and getting an Employer Identification Number (EIN) from the IRS once sales, contracts, or liability exposure grow.[15]
This information is general and educational, not personalized legal, tax, or accounting advice. Requirements vary by state and individual circumstances. Consider consulting a qualified professional before making structural or tax-registration decisions for your specific business.
Phase 6: Pre-launch QA
Step 21. Run a complete test order
Before any real customer sees your store, walk through the entire purchase and fulfillment flow yourself, end to end. This is one of the more valuable hours you can spend before launch, and it's a step most guides skip entirely.
The full flow to test:
- Homepage. Does it load correctly on both desktop and mobile, and is it obvious what you sell?
- Collection page. Do products display correctly, with accurate images and prices?
- Product page. Does every variant option work, and do the images, description, and shipping estimate match what you configured in Step 14?
- Add to cart. Does the cart update correctly, including quantity changes and variant selection?
- Checkout. Do your shipping rates from Step 17 display correctly for a US address?
- Test payment. Confirm a transaction actually processes using one of Shopify's real testing options: the built-in Bogus Gateway (a test payment provider available to any store, at no charge, that doesn't appear in your payouts or reports), Shopify Payments' own test mode, or a supported third-party provider's test mode where one is offered. While a payment provider is in test mode, customers can't place live orders through it, so deactivate test mode again once you've confirmed checkout works. If you'd rather test with a real card, place a low-value real order outside test mode and immediately cancel and refund it instead.
- Confirmation. Does the customer receive an accurate order confirmation email with the correct order details?
- Shopify order record. Does the order appear correctly in Shopify Admin → Orders, with the right product, variant, and shipping address?
- Supplier workflow. If you're using a product-import or automation app, confirm the order actually reaches the supplier correctly, whether that happens automatically or requires a manual step on your end.
- Tracking. Once the supplier ships, does tracking information make it back to Shopify and, from there, to the customer?
- Customer notification. Does the customer receive shipping and delivery notifications at the stages you'd expect?

What to check before moving on. Every step above should work without you having to manually patch a broken link, a missing shipping rate, or a misconfigured variant. If something breaks during your own test order, a real customer will hit the same problem, minus your patience for troubleshooting it.
Common beginner mistake. Launching paid traffic to a store that's never processed a real test order. Fixing a broken checkout after you've already spent ad budget driving people to it is a common and avoidable way to lose money in week one.
Phase 7: Launch
Step 22. Start organic marketing
Short-form video on platforms like TikTok and Instagram Reels remains one of the lowest-cost ways to get a first read on whether a product resonates, since the main cost is the product sample itself rather than ad spend. Keep content format simple and consistent: a clear demonstration of the product solving its stated problem, filmed and posted regularly enough to generate a real sample size of results, not just one video.
Your blog and your email list won't drive immediate sales, but both compound over time and reduce your long-term dependence on paid traffic. They live in different places, though. Blog posts are managed at Shopify Admin → Content → Blog posts. Email marketing runs through Shopify Messaging (Shopify Admin → Apps → Messaging → Create campaign), sent to the contact and subscriber list you build from checkout opt-ins and signup forms, which you can review under Customers → Email subscribers.
Step 23. Run controlled paid tests
Once organic content or early sales give you some signal, add a modest, consistent daily budget on one platform, tracked against actual sales and cost per result rather than vanity metrics like views or likes. This gives you far more useful data than a single large one-time spend spread across multiple platforms and creatives at once.
What to check before moving on. Know your break-even cost per sale (from Step 15) before you start spending, so you can judge results against a real number instead of a gut feeling.
Step 24. Decide whether to stop, iterate, or scale
Timelines vary too much by niche, price point, and execution quality to promise a specific number of weeks to your first sale or to consistent revenue. Budget for several weeks of testing multiple products before drawing firm conclusions, and treat a slow first few weeks as a normal part of the process rather than a signal to quit immediately.
After a real testing period with real ad spend, you're generally looking at one of three outcomes:
- Stop. The product shows weak demand, thin margin, or a fulfillment problem uncovered during testing. Return to Step 10 with a new candidate.
- Iterate. Early signal is mixed. Try a different angle, price point, or audience before abandoning the product entirely.
- Scale. You have consistent, profitable sales at your tested budget. Move to Phase 8.
Phase 8: Scale
Once a product is working, a handful of levers tend to matter more than adding new tools for their own sake:
- Suppliers. Add a second supplier for your best-selling products so a single stockout or shipping delay doesn't stall your whole business.
- Fulfillment. Revisit whether a product-import or automation app, or a move toward Shopify Collective or a direct supplier relationship, better fits your order volume now than it did at launch.
- Creatives. Expand beyond your first winning angle with new demonstrations, use cases, or formats, rather than running one creative until it fatigues.
- Bundles. Pairing complementary products can raise average order value without needing an entirely new product to source and validate.
- Email. A list you've been building since Step 22 becomes a genuinely low-cost repeat-purchase channel once you have real customers to email.
- SEO and content. Blog content tied to your niche compounds slowly but reduces your long-term dependence on paid acquisition.
- Customer retention. Fast, clear support and an easy returns experience directly affect whether a one-time buyer becomes a repeat one.
- Direct sourcing. Once you have real sales data, renegotiating directly with a manufacturer or wholesaler (see Step 11) can improve margin in ways an app-based catalog usually can't.
- Operational automation. As order volume grows, revisit which manual tasks from Phases 3 and 4 are worth automating with a dedicated app, since the time trade-off changes once you're processing real volume instead of testing.
Common mistakes that sink new stores
- Picking a product on a single signal. A high view count or a trending sound is not evidence of profitability on its own. Combine it with the demand, margin, competition, and fulfillment checks from Step 10.
- Underestimating the real monthly cost. The plan fee is the smallest number in the budget. Apps, payment fees, and marketing typically cost more than the platform itself.
- Skipping supplier vetting. A single late shipment or quality complaint can undo months of marketing work. Order a sample before committing to a supplier at scale.
- Launching without a completed test order. A broken checkout or an incorrect shipping rate found by a paying customer is far more costly than one found by you in Step 21.
- Treating sales tax as a later problem. Nexus thresholds are based on your actual sales activity, not on whether you remembered to check. Review your obligations as revenue grows, not after a state notice arrives.
- Quitting during the testing phase. A few weeks without a clear winner is normal for product testing. The more common failure is stopping before enough data exists to judge a product fairly.
Frequently asked questions
Do I need to buy inventory to start dropshipping on Shopify?
Not in the traditional retail sense of pre-purchasing bulk stock. Your supplier holds and ships inventory. That said, supplier payment timing and payment-provider payout timing don't always line up, so you can still need some working capital, especially before your payout schedule catches up with your order volume.
How much should I budget for my first month?
Plan for the Shopify plan fee, a domain, a modest app budget, product samples, and a testing budget for organic content or a small paid-ad spend. A lean first month commonly falls in the $150 to $600 range, with paid advertising as the main variable that can push costs higher.
Do I need an LLC before I start?
No. A sole proprietorship requires no separate formal registration to begin operating in most states, which is why many beginners start there. Consider forming an LLC once sales, contracts, or liability exposure increase. This is general information, not personalized legal advice; consider consulting a qualified professional for your specific situation.
Is Shopify Collective better than a third-party sourcing app?
Neither is universal. Shopify Collective can work well for eligible retailers who want to connect with eligible suppliers without negotiating individually, but both sides need to meet Shopify's country, currency, and active-plan eligibility requirements, and the catalog is limited to participating merchants. Third-party apps typically offer a broader catalog and more automation, at the cost of an added app fee and supplier quality that varies by app and by individual supplier. Many sellers use both.
How long does it take to know if a product is working?
There's no fixed number that applies to every niche and price point. Budget for several weeks of testing with a real, tracked ad spend before drawing conclusions, and treat a slow start as normal rather than a reason to quit after a few days.
How do I know if a product is actually worth testing?
Look at demand direction, lifecycle stage, margin after real costs, how differentiated your offer is, fulfillment risk, and current advertising activity, rather than relying on any single metric. Treat the result as a research signal that narrows your list, not as proof the product will sell.
What's the biggest difference between a store that works and one that stalls?
Usually not the product itself. It's whether the seller vetted suppliers before scaling, ran a real test order before launching, and tracked results against an actual break-even number instead of a feeling.
Conclusion
A Shopify dropshipping store is genuinely fast to set up and genuinely slow to prove out. Account creation, branding, theme, and navigation, covered in Phase 2, usually take a weekend. What separates stores that make money from stores that quietly stall is everything in Phases 3 through 7: choosing a sourcing method that fits how you actually want to operate, vetting suppliers before you scale, evaluating products against real evidence instead of a single metric, running a complete test order before launch, and budgeting honestly for the costs that show up after the plan fee. Work through the eight phases in order, don't skip the supplier and QA steps to save time, and review the signals behind a product before you decide any single one deserves a test budget.
Sources
- [1] Shopify Pricing. Shopify. https://www.shopify.com/pricing. Accessed August 7, 2026.
- [2] Domains. Shopify Help Center. https://help.shopify.com/en/manual/domains. Accessed August 7, 2026.
- [3] Customizing themes. Shopify Help Center. https://help.shopify.com/en/manual/online-store/themes/customizing-themes. Accessed August 7, 2026.
- [4] Add, remove, or edit menu items in your online store. Shopify Help Center. https://help.shopify.com/en/manual/online-store/menus-and-links/editing-menus. Accessed August 7, 2026.
- [5] Shopify Collective. Shopify Help Center. https://help.shopify.com/en/manual/online-sales-channels/shopify-collective. Accessed August 7, 2026.
- [6] Adding and updating products. Shopify Help Center. https://help.shopify.com/en/manual/products/add-update-products. Accessed August 7, 2026.
- [7] Changing your store currency. Shopify Help Center. https://help.shopify.com/en/manual/payments/shopify-payments/store-currency/changing-your-store-currency. Accessed August 7, 2026.
- [8] Creating and activating markets. Shopify Help Center. https://help.shopify.com/en/manual/markets/getting-started/set-up-markets. Accessed August 7, 2026.
- [9] Using the checkout and accounts editor. Shopify Help Center. https://help.shopify.com/en/manual/checkout-settings/customize-checkout-configurations/checkout-editor. Accessed August 7, 2026.
- [10] Setting up and managing shipping profiles. Shopify Help Center. https://help.shopify.com/en/manual/fulfillment/setup/shipping-profiles/setting-up-shipping-profiles. Accessed August 7, 2026.
- [11] Setting up Shopify Payments. Shopify Help Center. https://help.shopify.com/en/manual/payments/shopify-payments/onboarding. Accessed August 7, 2026.
- [12] Adding store policies. Shopify Help Center. https://help.shopify.com/en/manual/checkout-settings/refund-privacy-tos. Accessed August 7, 2026.
- [13] State-by-state guide to economic nexus laws. Avalara. https://www.avalara.com/us/en/learn/guides/state-by-state-guide-economic-nexus-laws.html. Accessed August 7, 2026.
- [14] Setting up US taxes. Shopify Help Center. https://help.shopify.com/en/manual/taxes/us/us-tax-setup. Accessed August 7, 2026.
- [15] Do you need an EIN? Internal Revenue Service. https://www.irs.gov/businesses/small-businesses-self-employed/do-you-need-an-ein. Accessed August 7, 2026.
This information is provided for general educational purposes and may not apply to every business or jurisdiction. Consider consulting a qualified legal, tax, or financial professional for advice specific to your situation. Dropmind provides research tools and informational signals; product and advertising signals do not guarantee sales or profitability.